Management / Deployment
The Deployment page provides tools to:
- Upload a new revision of the Comet project.
- Adhoc testing
- View the deployment timeline (including project revisions and configuration changes).
- Download a specific revision or its metadata.
- Deploy a revision to staging or production environments.
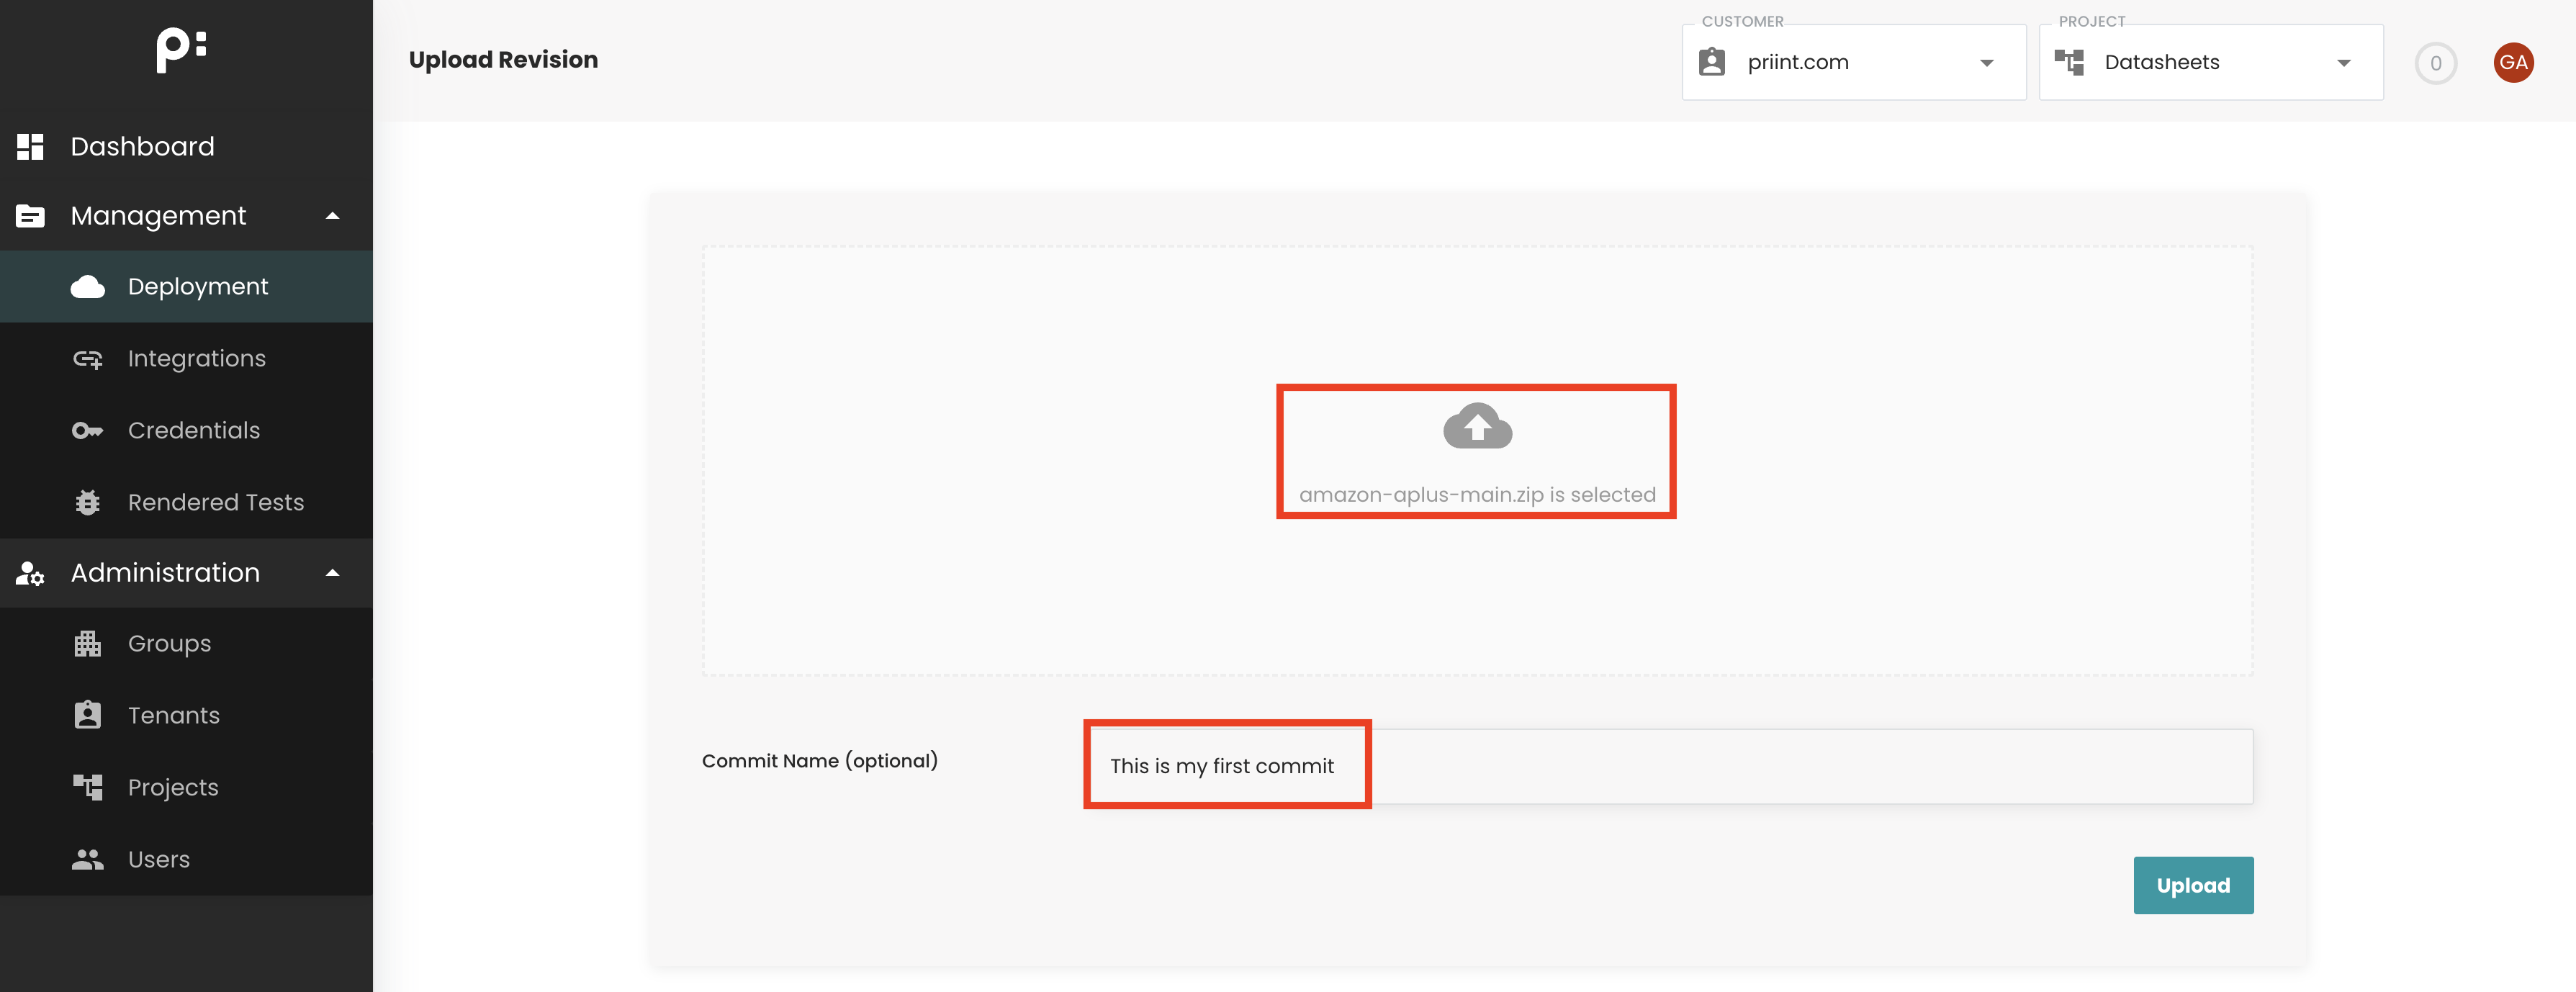
Uploading a New Comet Project Revision
-
Open the Deployment Page
Click Upload Revision to start the upload process.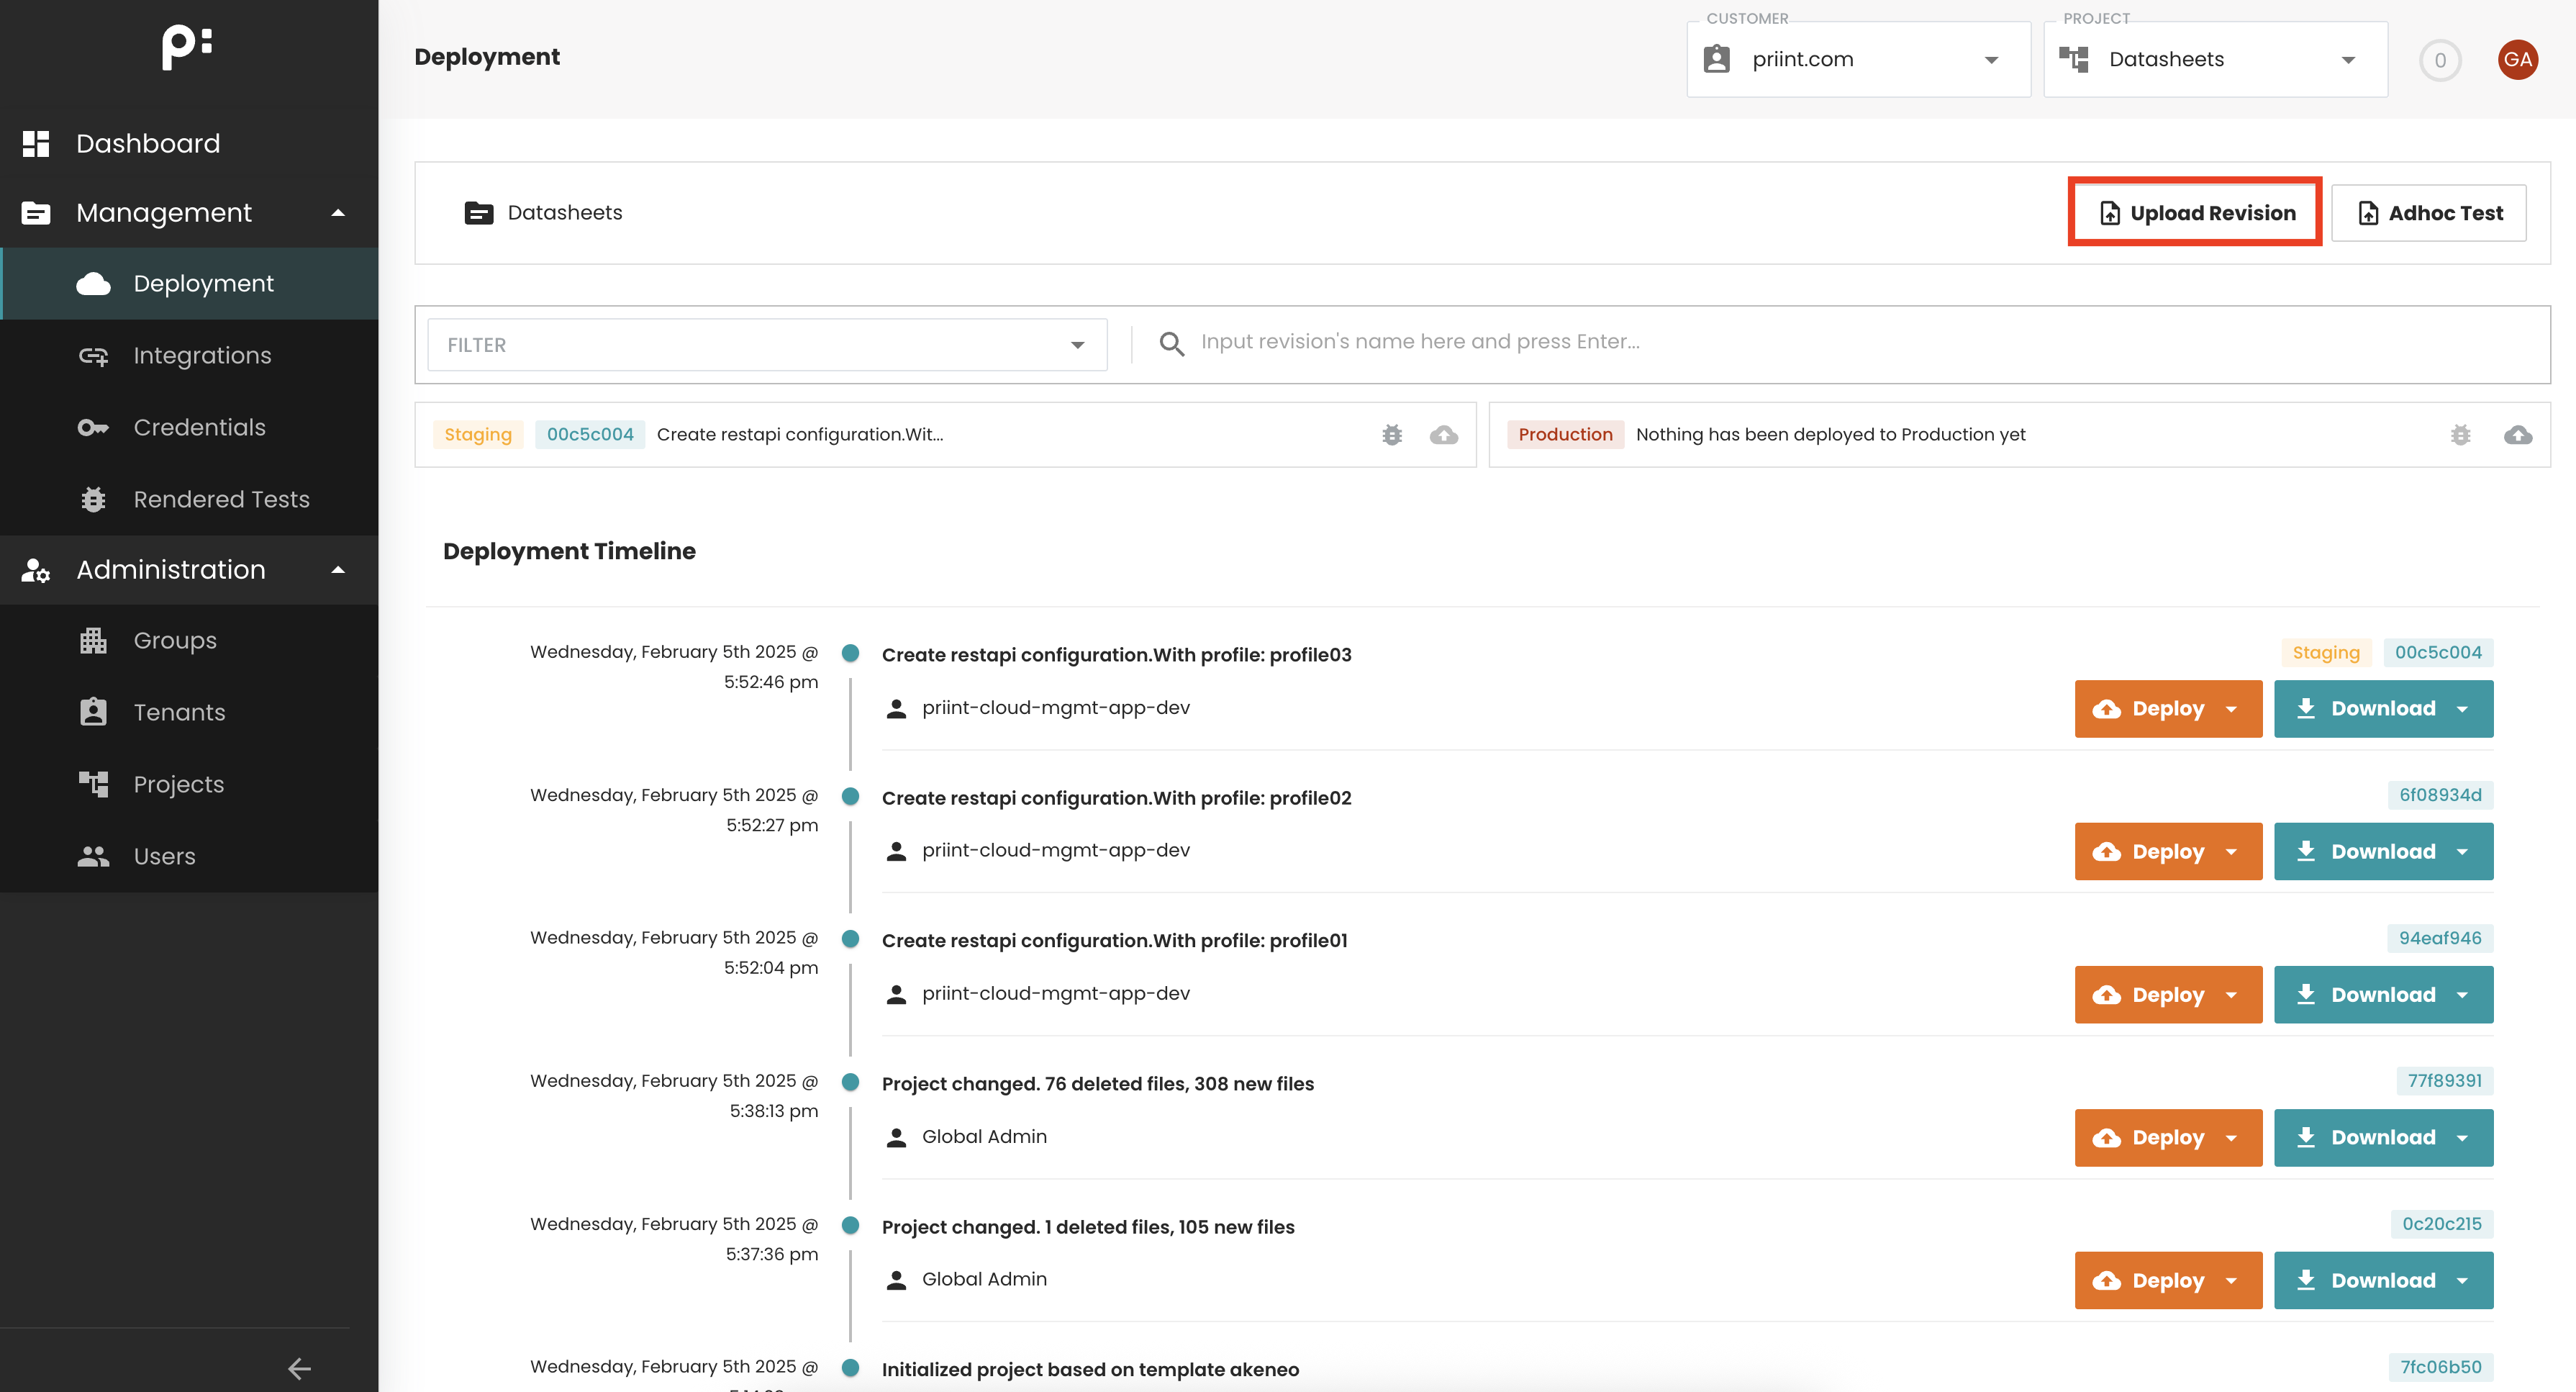
-
Select Your Project Archive
- Click Select File to open a file picker, or
- Drag and drop a ZIP archive containing your latest project into the upload area.
-
(Optional) Add a Commit Message
Enter a commit message for easier identification in the deployment timeline. -
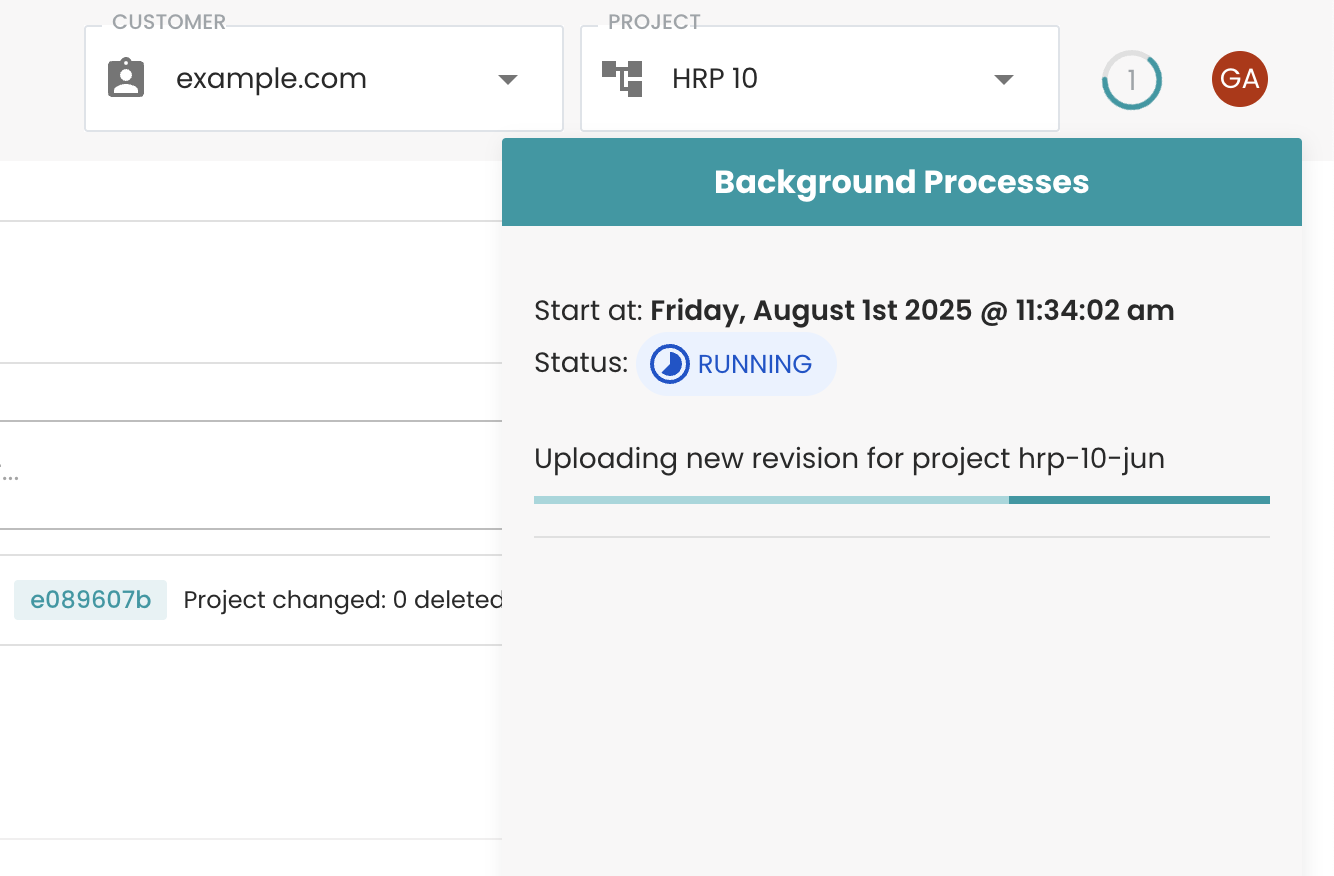
Upload and Validate
Click Upload. The archive will be uploaded and validated in the background.
Common validation issues include:- Incorrect directory structure.
- Special characters or invalid filename encoding.
-
Confirm Upload Completion
Once successful, a confirmation message will appear.
Refresh the deployment timeline to see your new revision.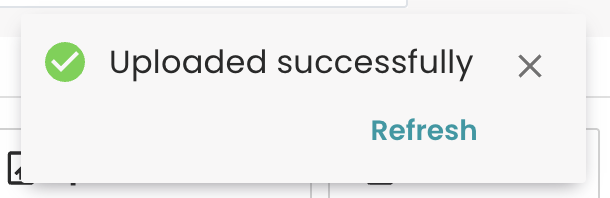
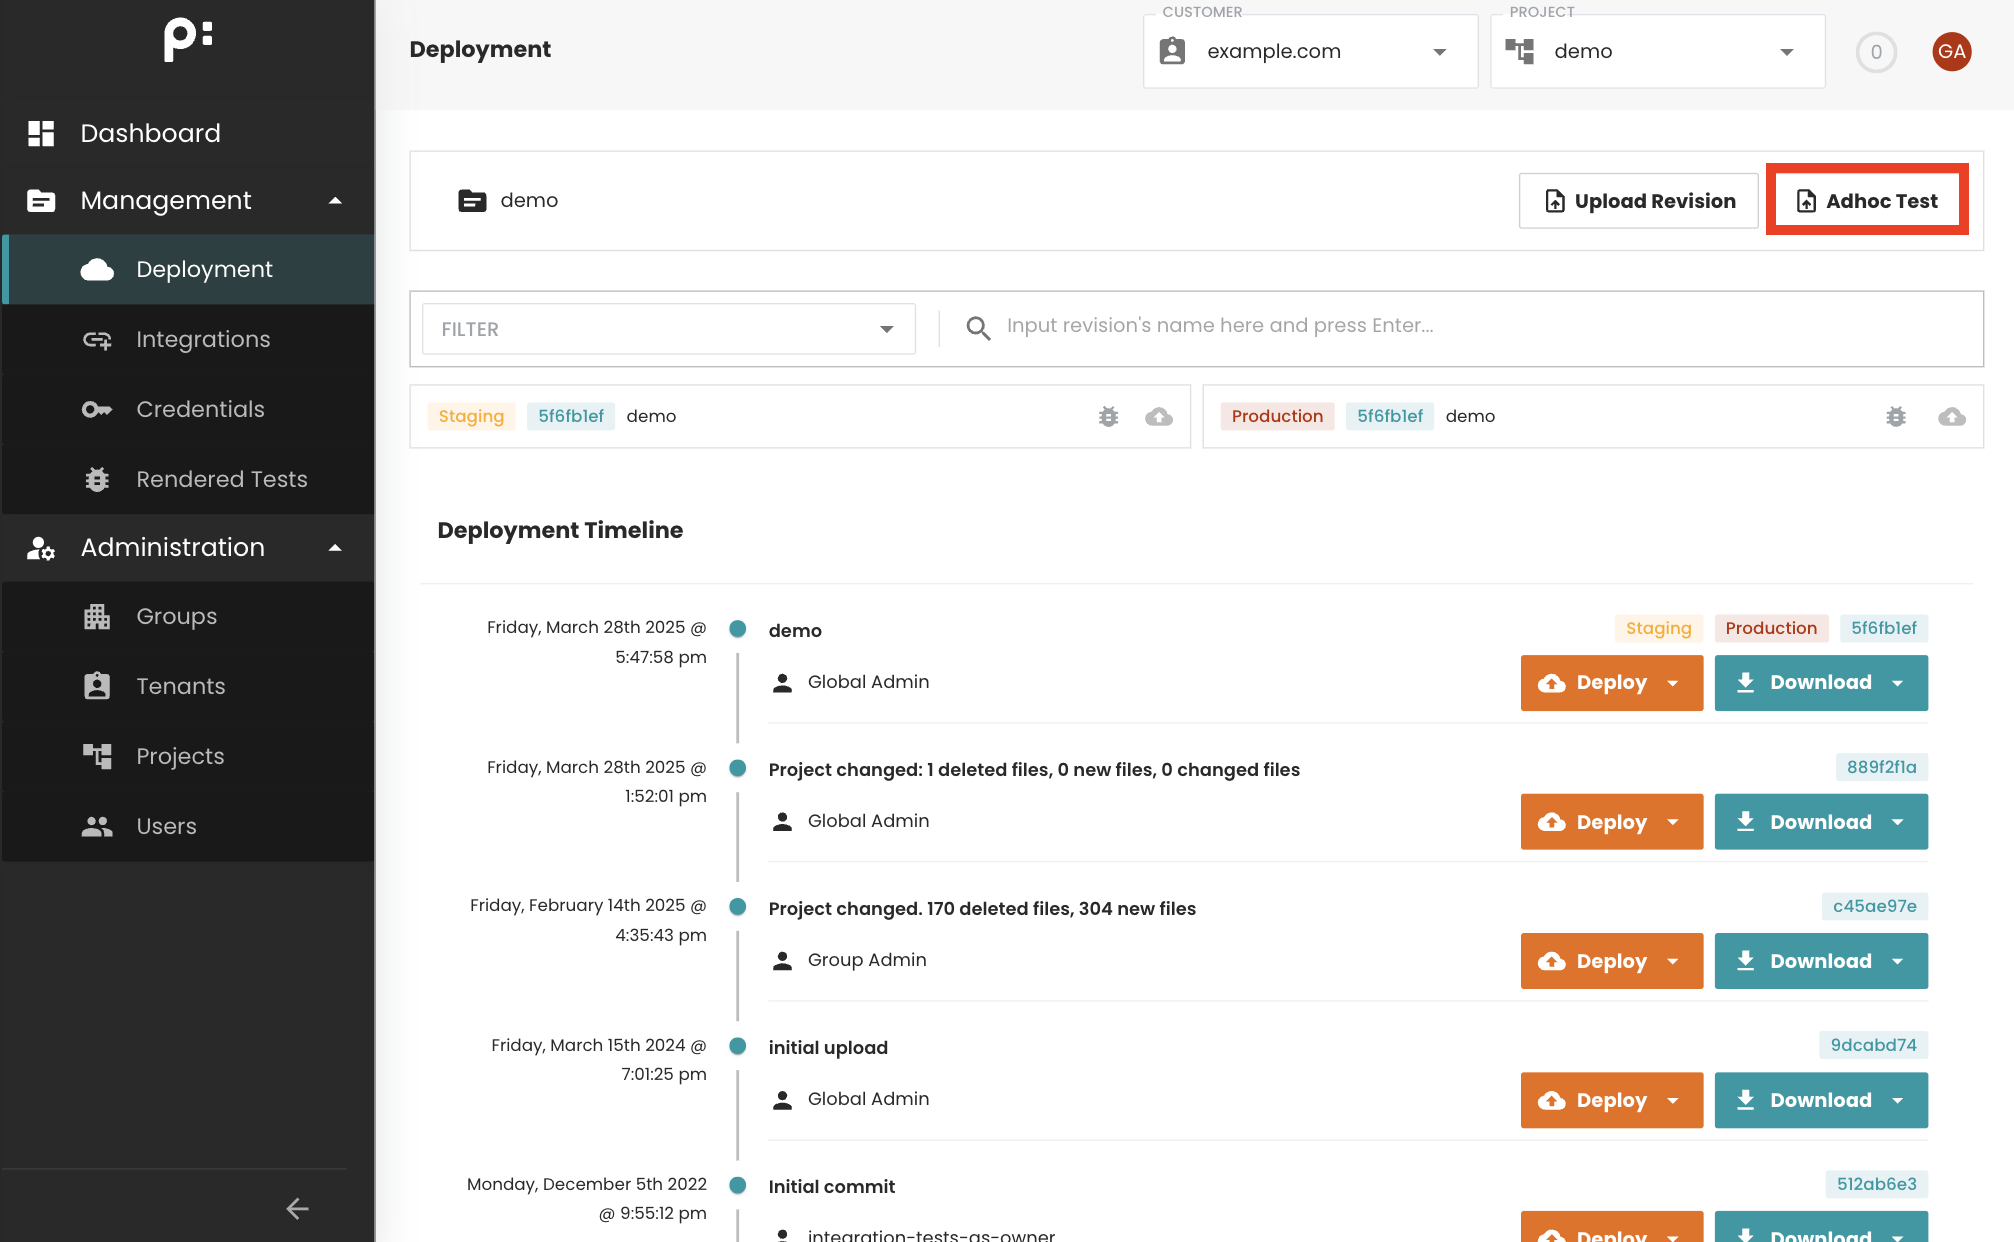
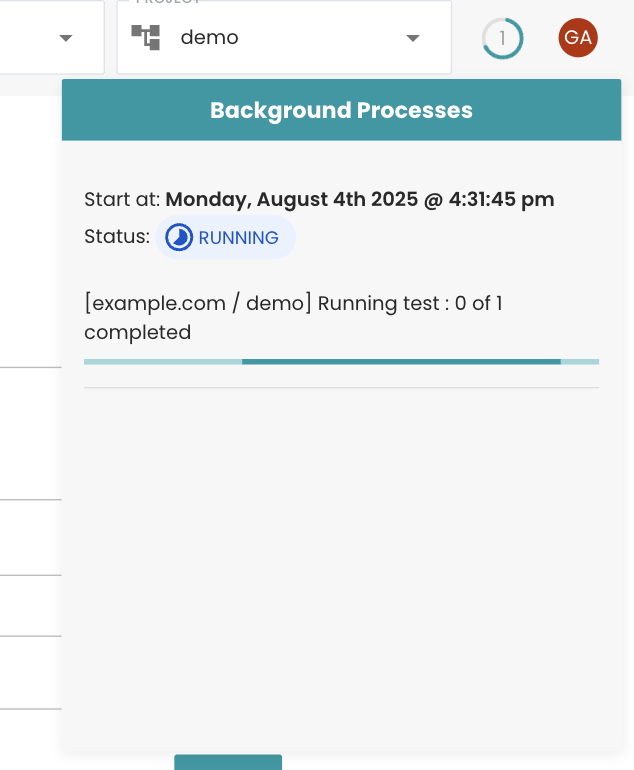
Adhoc testing
This feature allows user can to test their changes in comet projects before committing them to GIT or Management app repository.
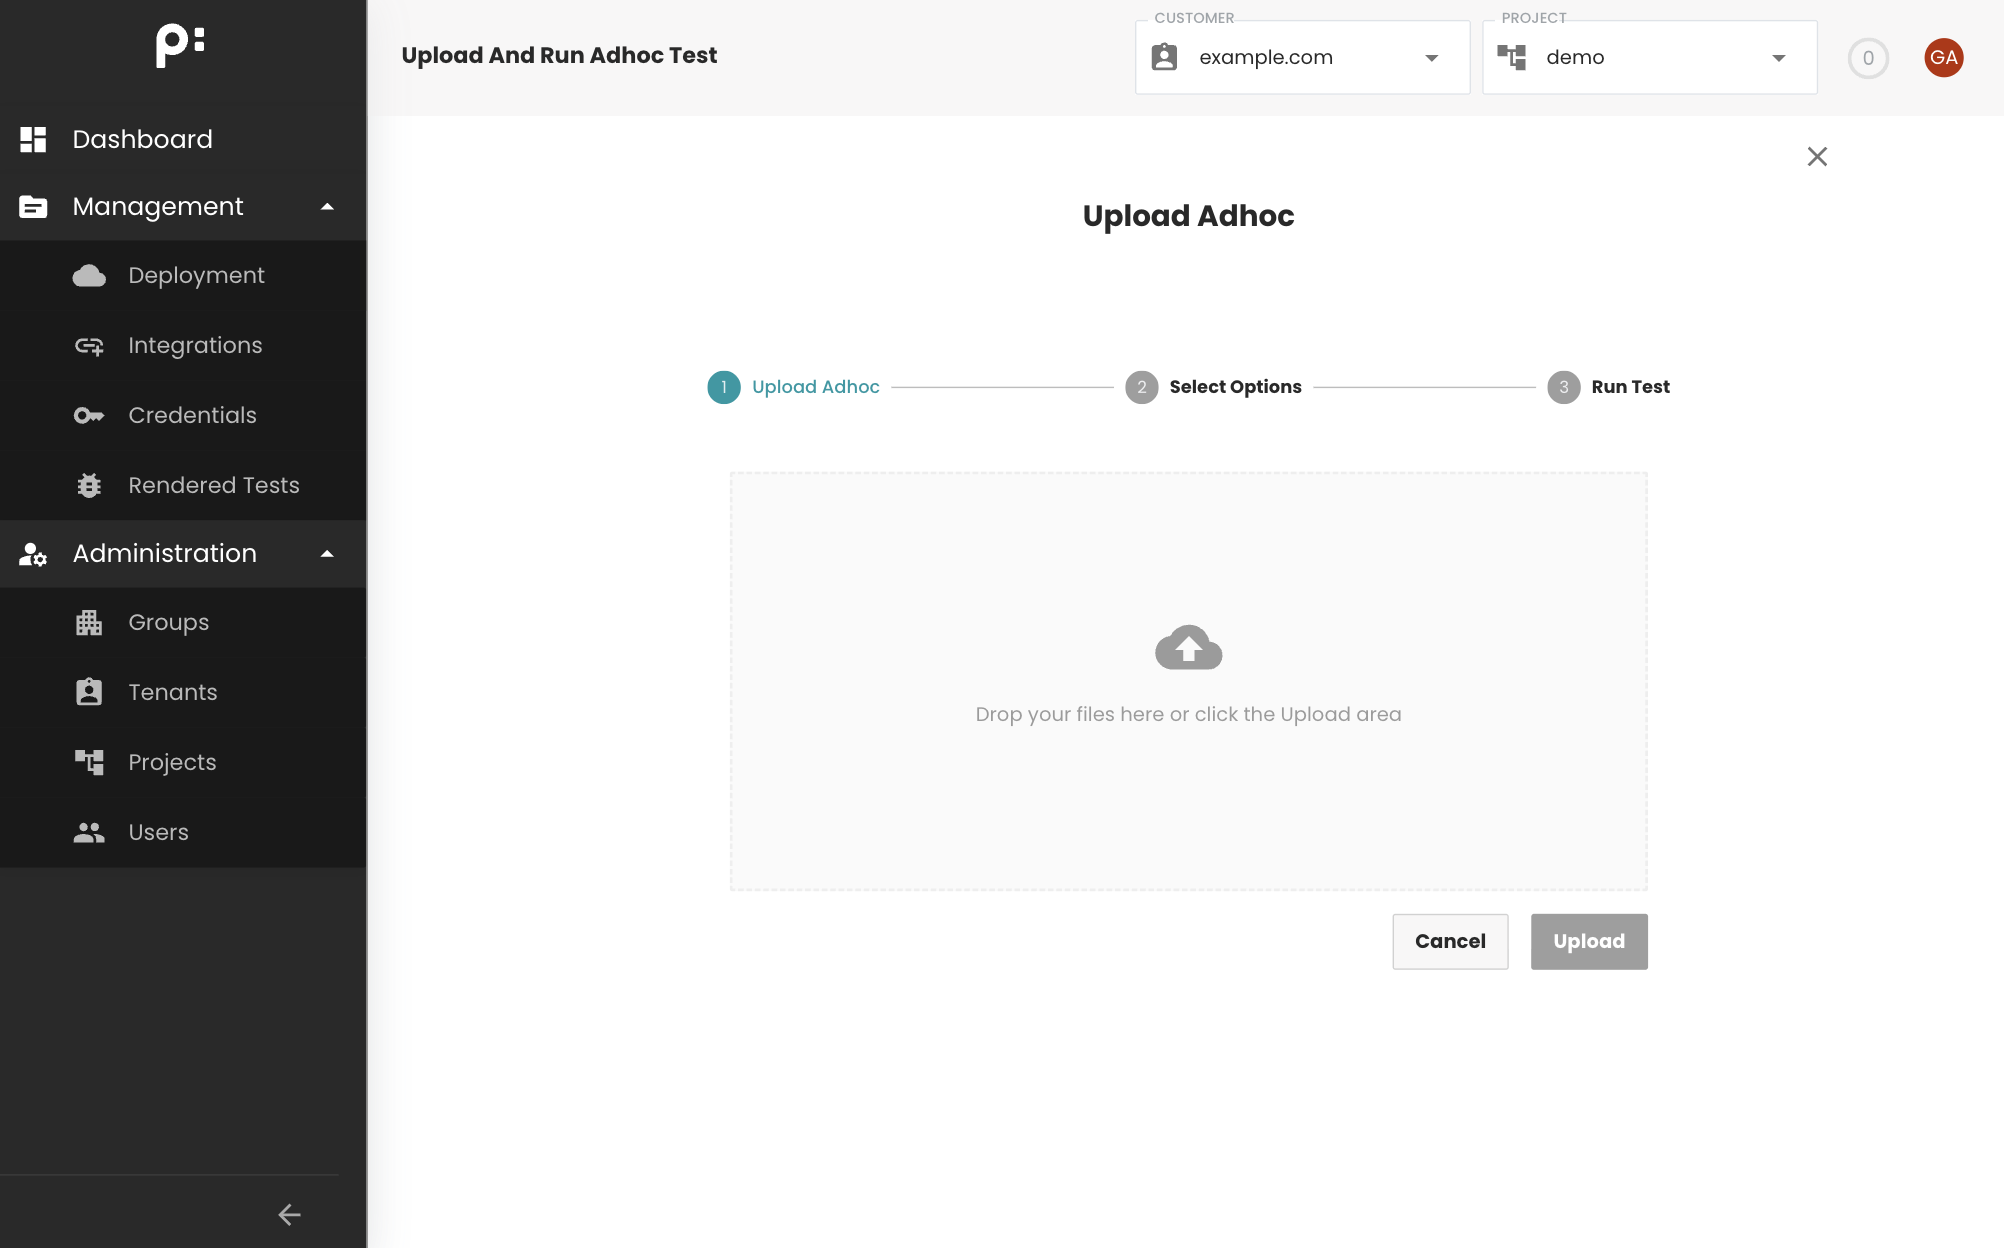
Click Adhoc Test button to open the view that allow you to upload project.
In the upload view, you can choose a zip file for uploading
After the file has been uploaded, select profile or test cases to run

Click Run Test to start running
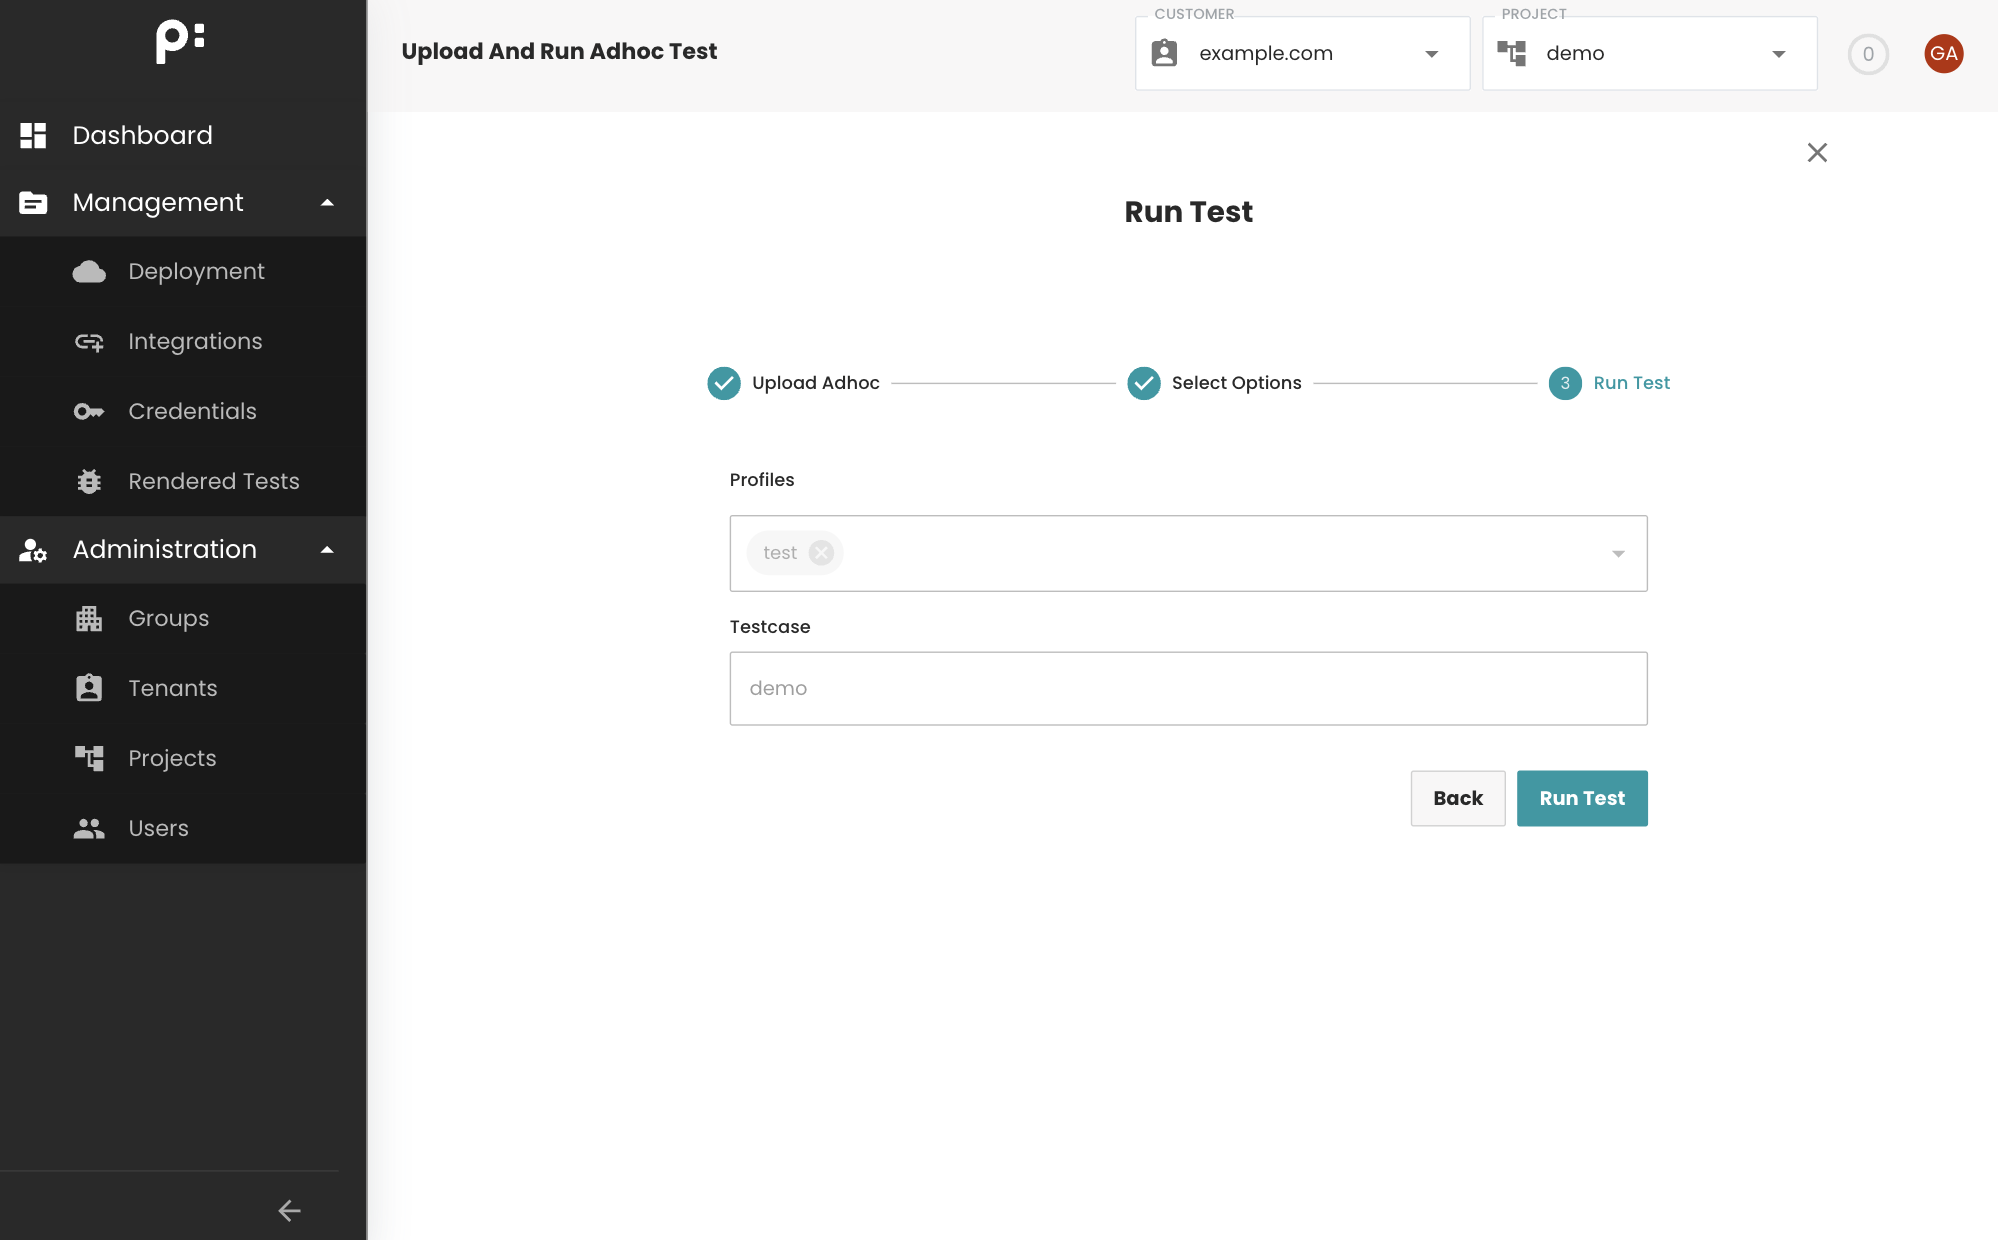
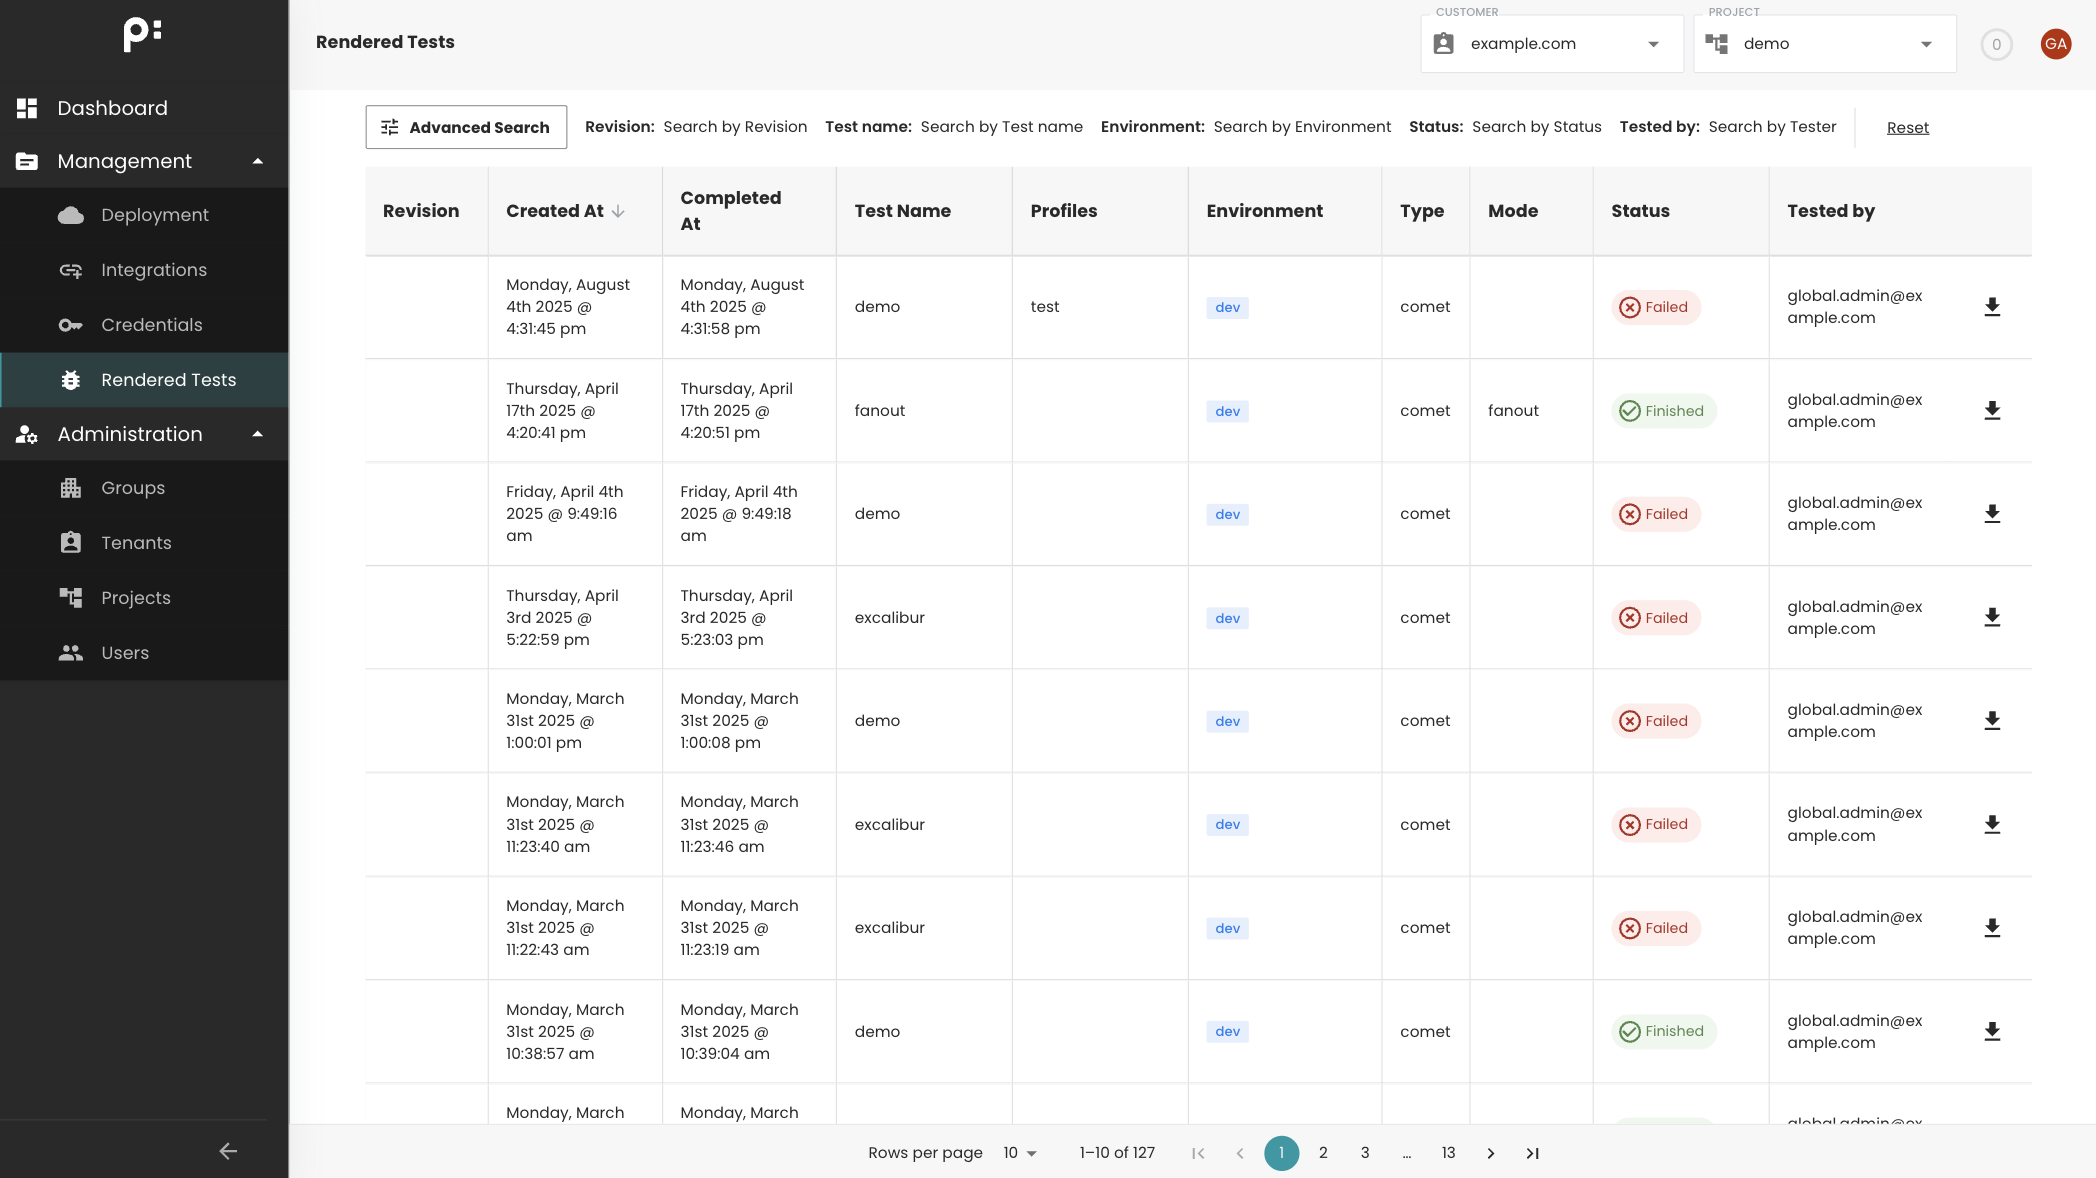
The process will be run in the background, after finish, a popup will show to redirect user to Rendered Tests view to see the result
Deploying to priint:cloud Rendering Service
The Deployment Timeline displays all available revisions, originating from either:
- Uploaded Comet projects.
- Integration configuration changes.
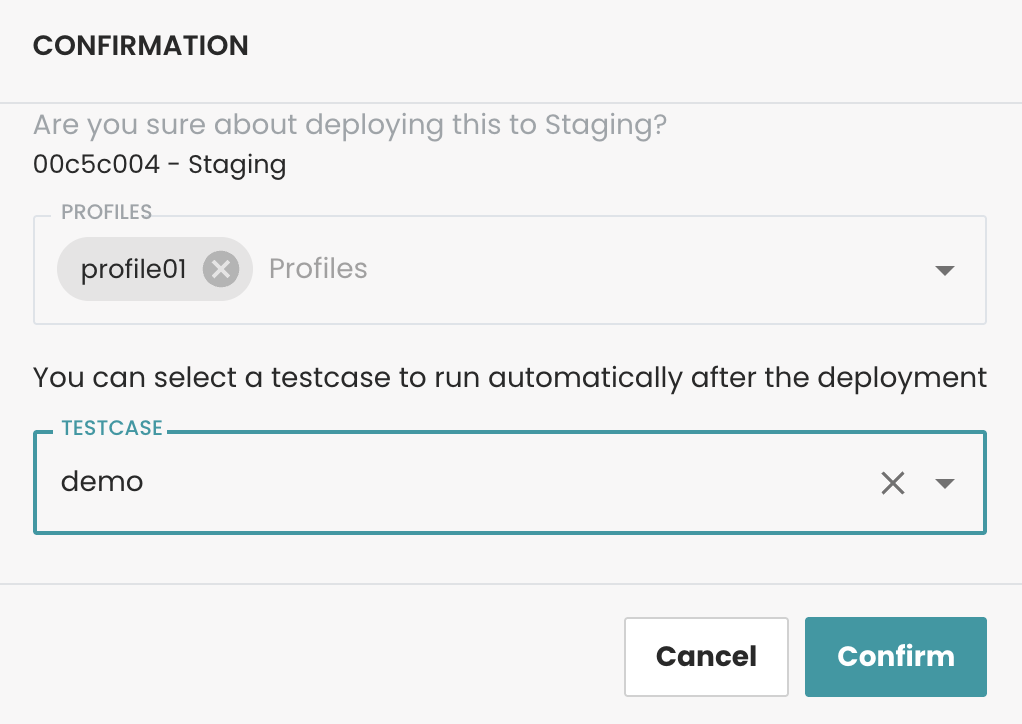
To deploy a revision:
-
Locate the desired revision in the timeline.
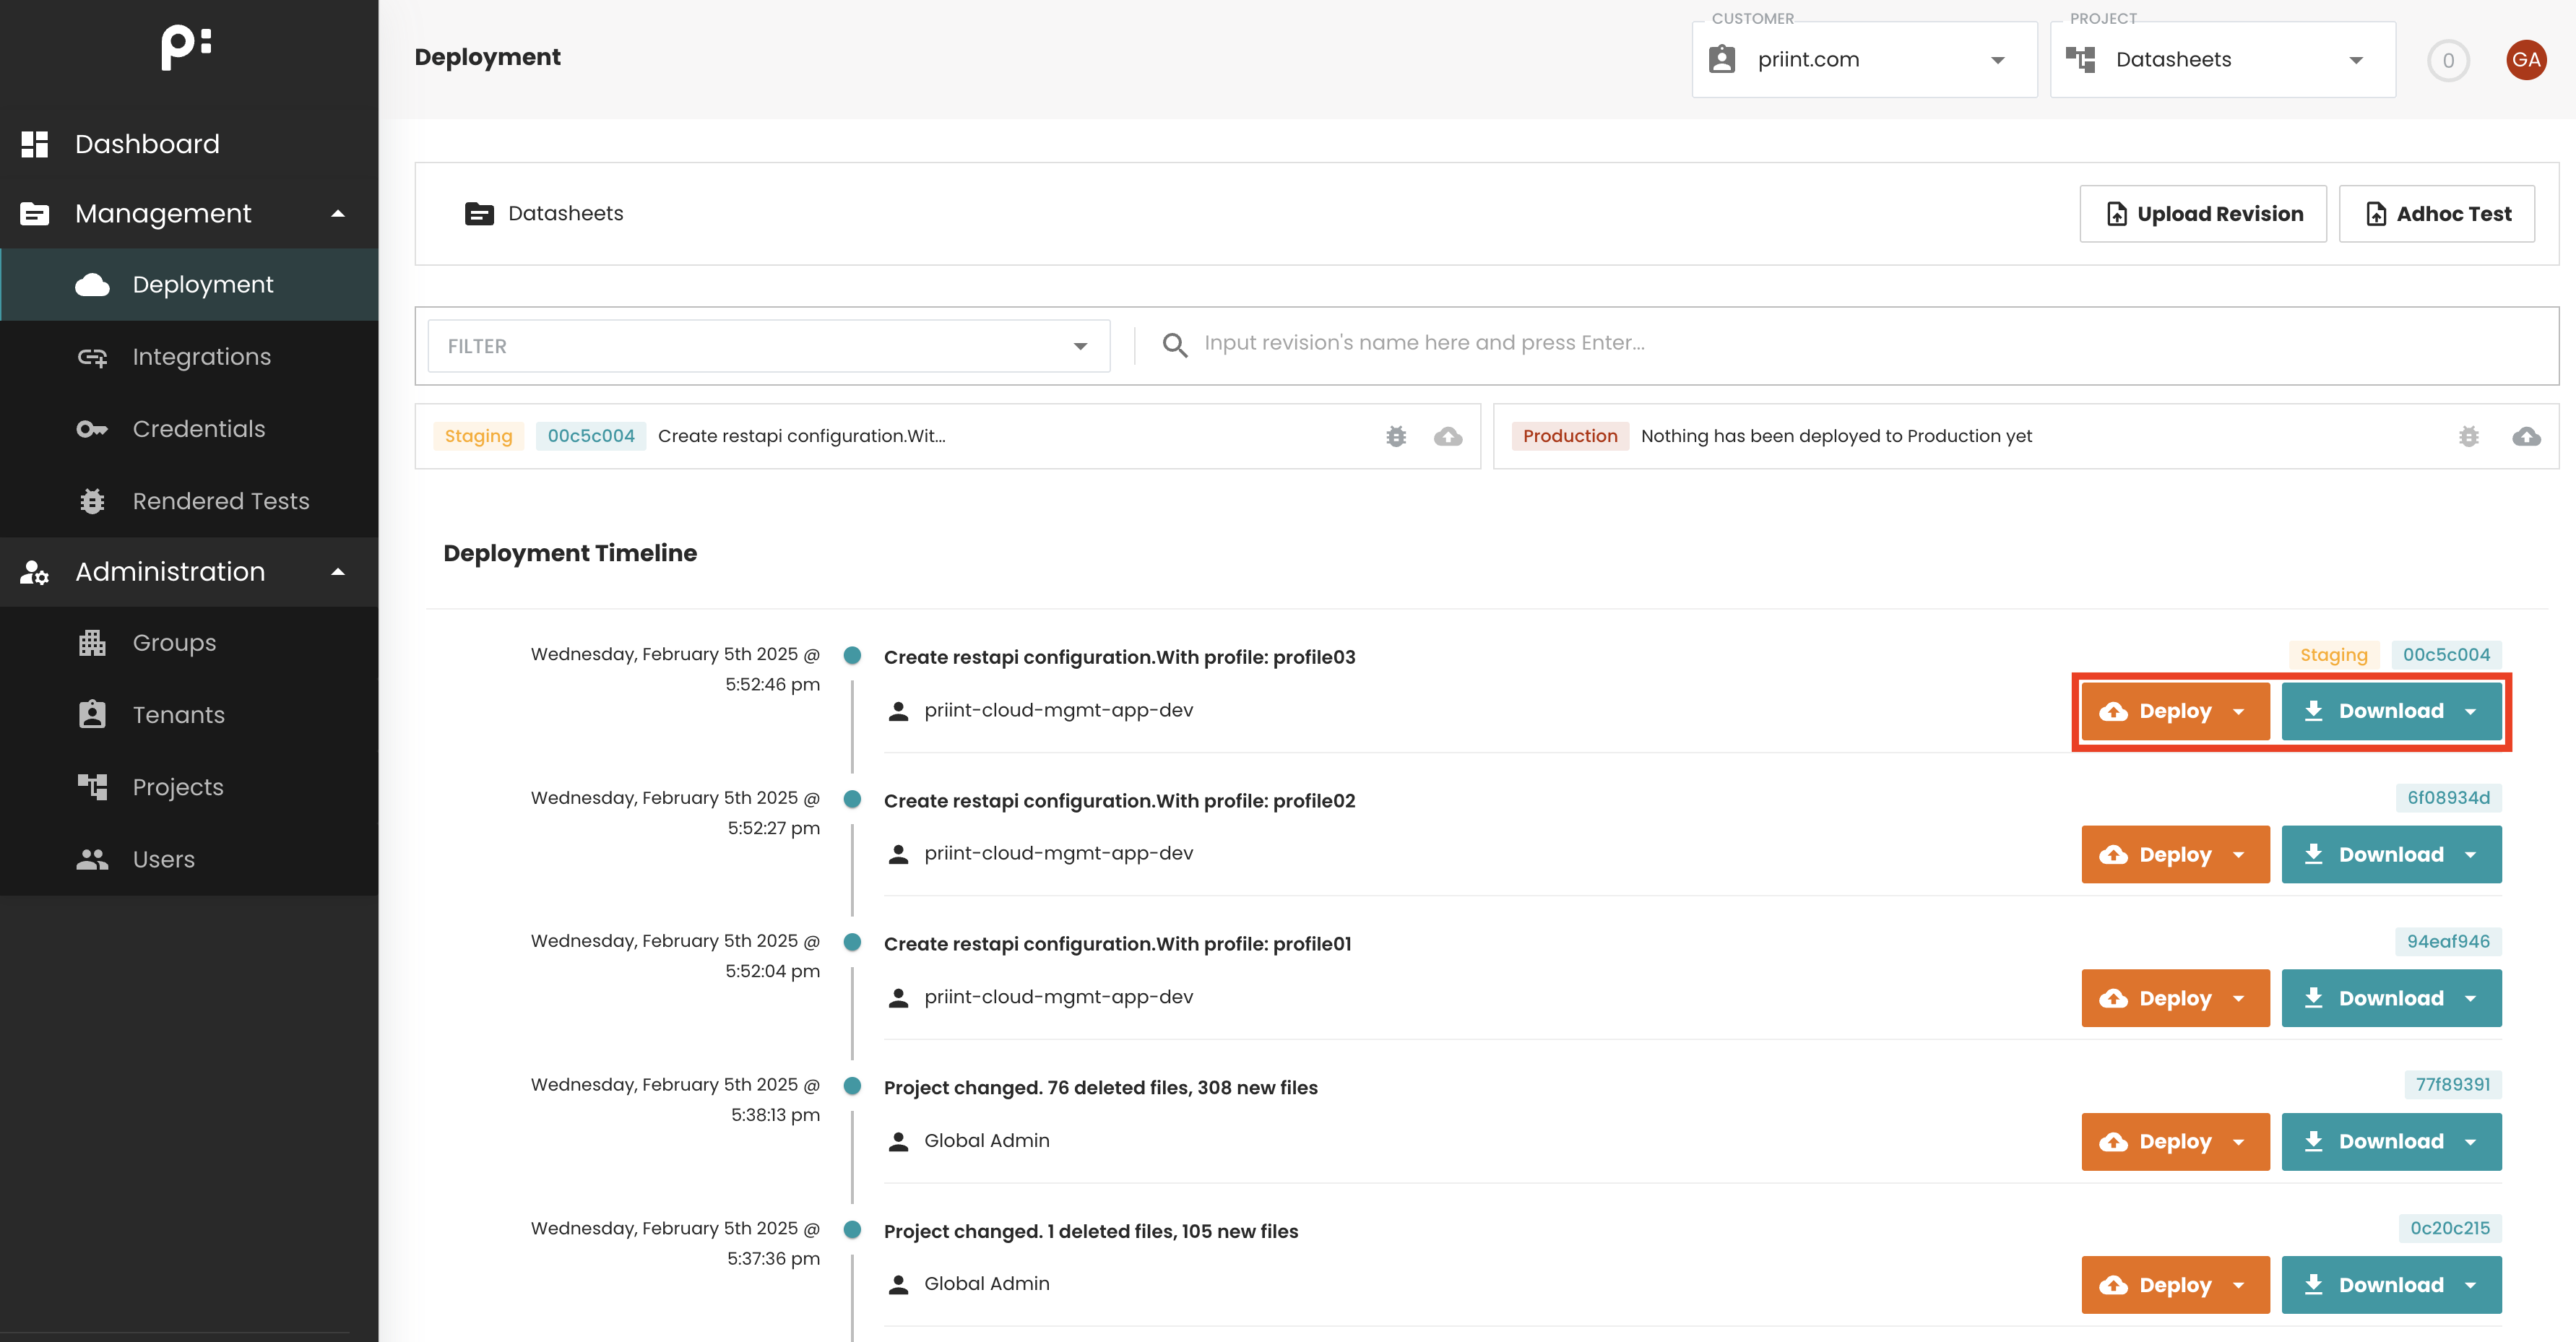
-
Select the target environment: Acceptance/Staging or Production.
warningOnly deploy to production after verifying and testing on staging.
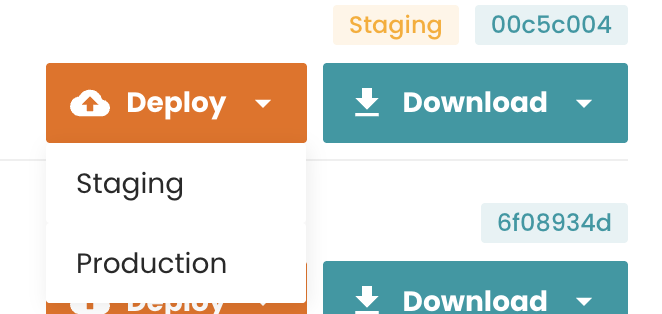
-
Click Deploy.
Running a Rendering Test After Deployment
If the revision contains a jobs folder with test cases:
-
Select a test case from the deployment dialog.
-
Choose a configuration profile from the profile dropdown.
-
Execute the rendering test.
-
After rendering, a popup will appear, allowing you to navigate to Rendered Tests to review the generated document and its artifacts.
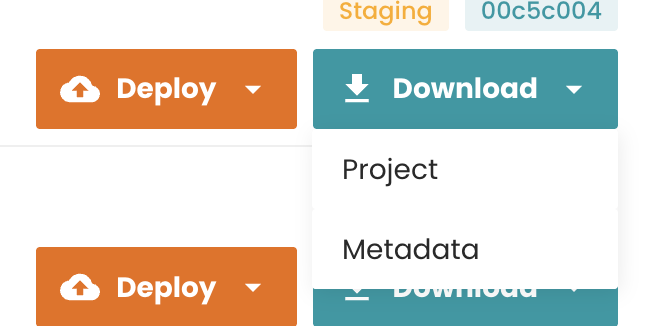
Downloading a Project Revision
-
In the Deployment Timeline, locate the desired revision.
-
Click Download to retrieve either:
- The full project archive.
- Project metadata.
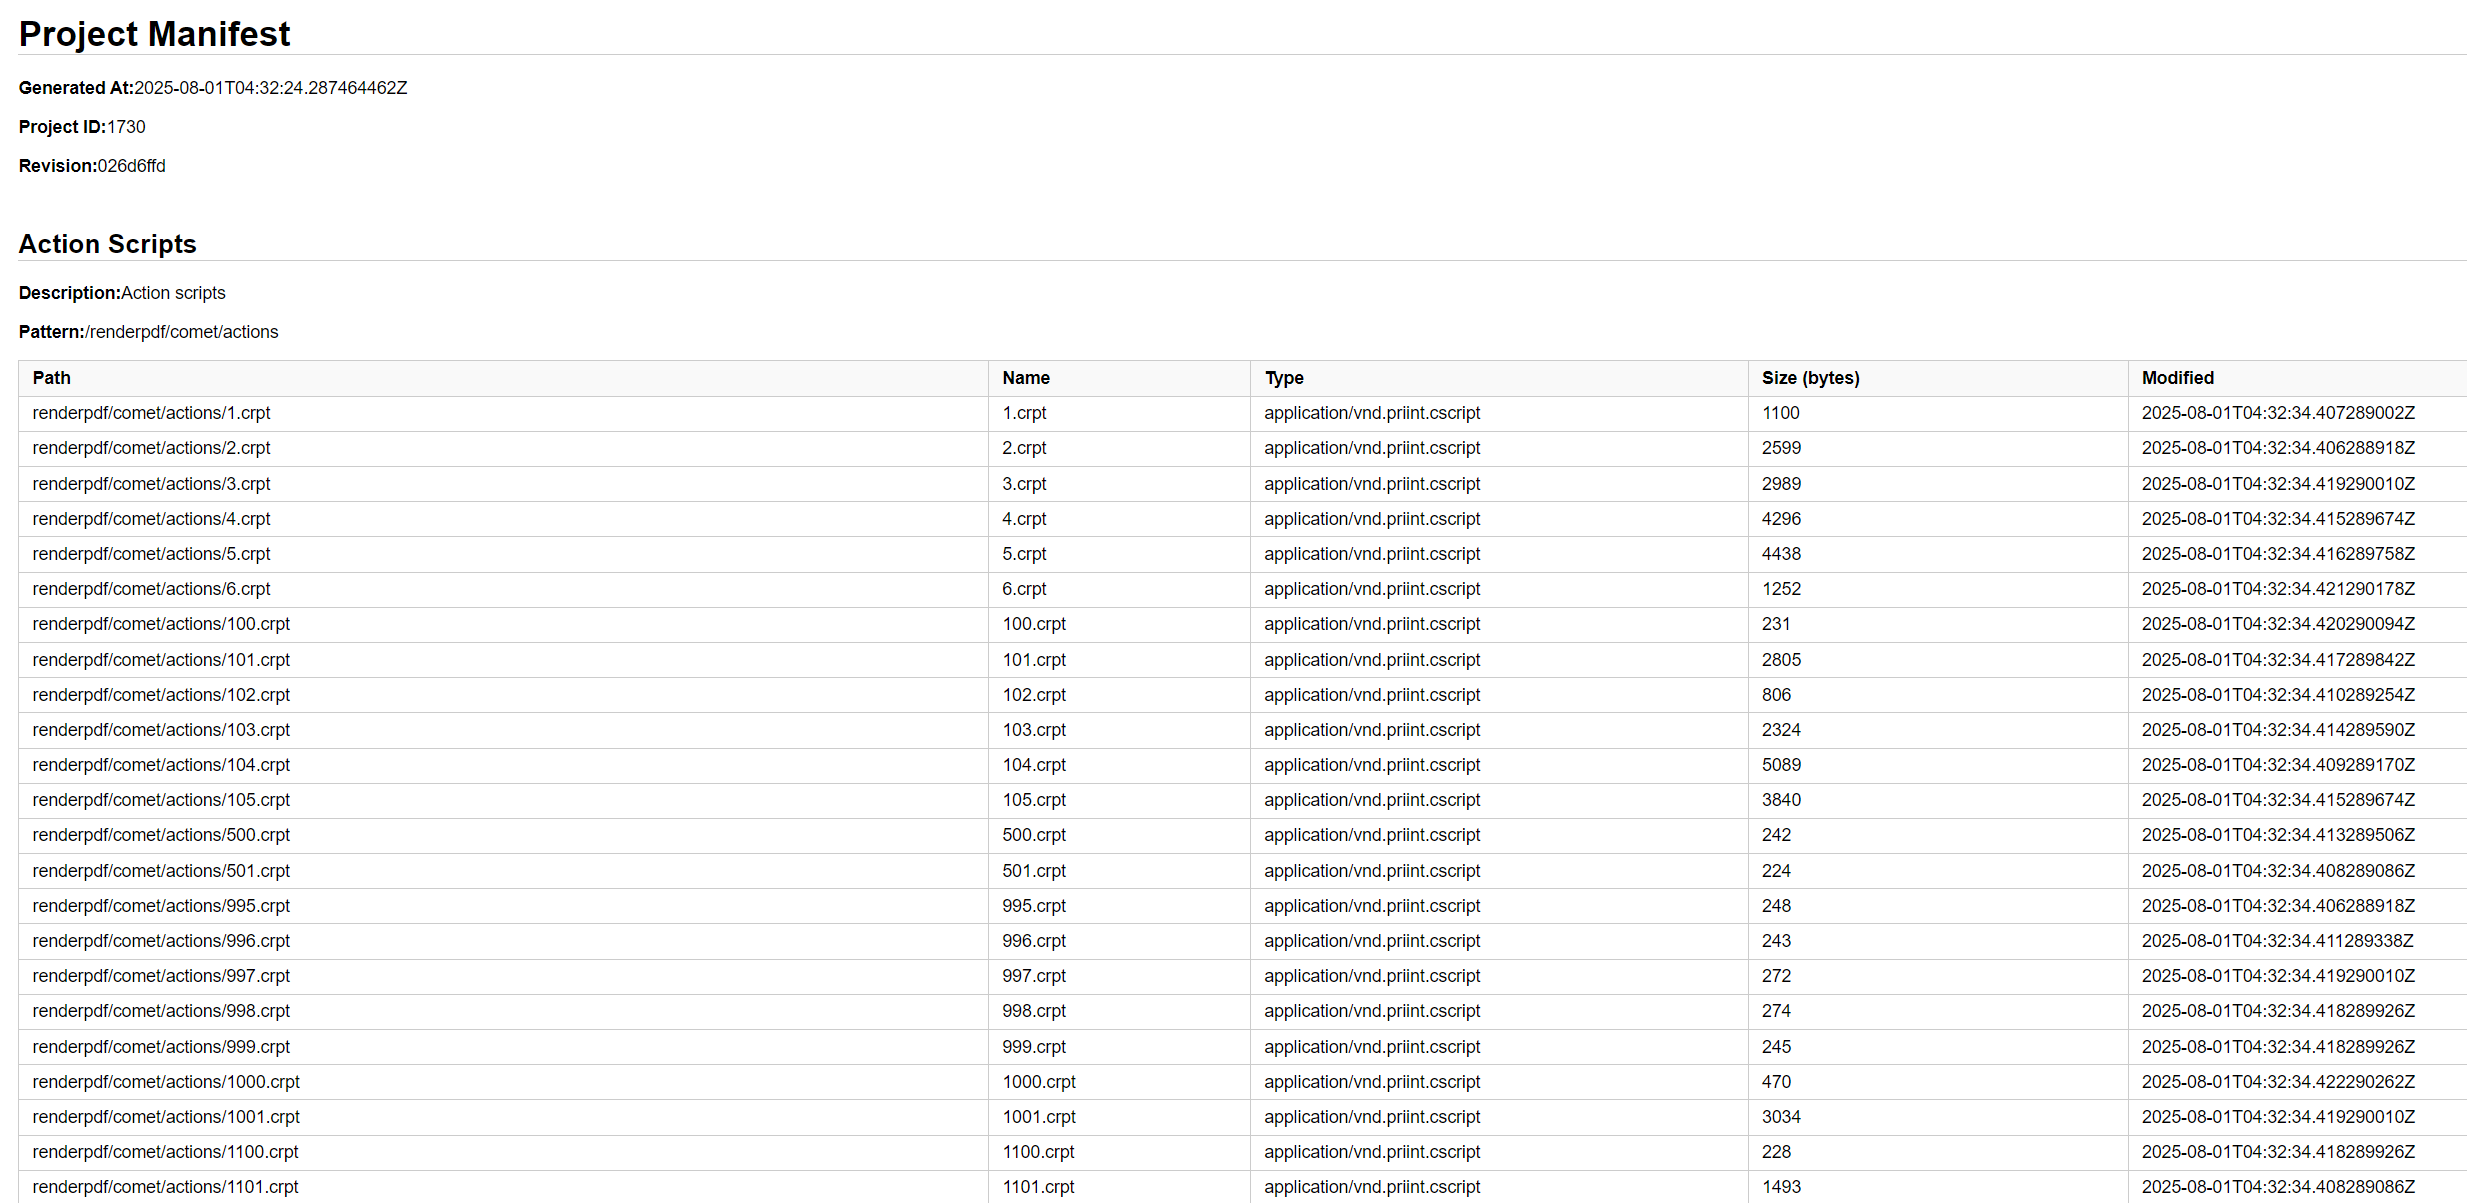
Project Metadata Contents
When downloading metadata, you can view detailed information about all project components, including:
- List of configuration profiles.
- List of templates.
- List of page templates (including width and height values).
- List of document templates.
- List of font information.
- List of export profiles (linked to
renderpdf-config). - List of static assets.
- List of document build workflows (linked to
renderpdf-config).